If you have noticed a soft, spongy, or bouncy feeling when you walk across certain areas of your manufactured home floor, you are not alone. Soft floors in manufactured homes are one of the most common repair issues homeowners face — and one of the most important to address quickly before minor damage becomes a major structural problem.
This step-by-step guide explains exactly why manufactured home floors go soft, how to diagnose the extent of the damage, and how to fix it yourself or know when to call a professional.
Why Do Manufactured Home Floors Go Soft?
Before you can fix a soft floor, you need to understand why it happened. In manufactured homes, there are four primary causes:
1. Moisture and Water Damage
By far the most common cause of soft manufactured home floors is moisture damage. Manufactured homes use a type of particleboard or oriented strand board (OSB) for subflooring in many models. These wood composite materials are far more vulnerable to moisture than solid wood — when they get wet, they swell, delaminate, and lose structural integrity, creating that soft, spongy feeling underfoot.
Sources of moisture that damage manufactured home subfloors include:
- Plumbing leaks (the most common culprit, especially under sinks and around toilets)
- Roof leaks that allow water to travel down walls and into the floor system
- Damaged or missing belly board allowing ground moisture to rise into the floor cavity
- Condensation from inadequate ventilation under the home
- Leaking water heaters or appliances
2. Pest Damage
Termites and other wood-destroying insects can compromise the structural integrity of manufactured home floors. In warm, humid climates — the Southeast and Gulf Coast states in particular — termite damage is a significant contributor to floor problems in older manufactured homes.
3. Age and Normal Wear
Over decades of use, manufactured home subflooring can degrade simply from normal foot traffic and age, particularly in high-traffic areas like hallways and in front of frequently used appliances.
4. Original Material Quality
Some older manufactured homes, particularly those built in the 1970s, 1980s, and 1990s, used subfloor materials that were thinner or of lower quality than what is used today. These homes are more prone to floor problems even without significant moisture exposure.
Step 1: Identify the Affected Area
Before doing anything else, walk carefully through every room of your home and map out the soft spots. Press firmly with your foot in different areas and note anywhere that feels spongy, bouncy, or that makes a creaking sound that seems to come from below the surface flooring rather than from the flooring itself.
Use a pen and paper or your phone to sketch a rough floor plan and mark the soft spots. This helps you understand the extent of the problem before you begin any repair work.
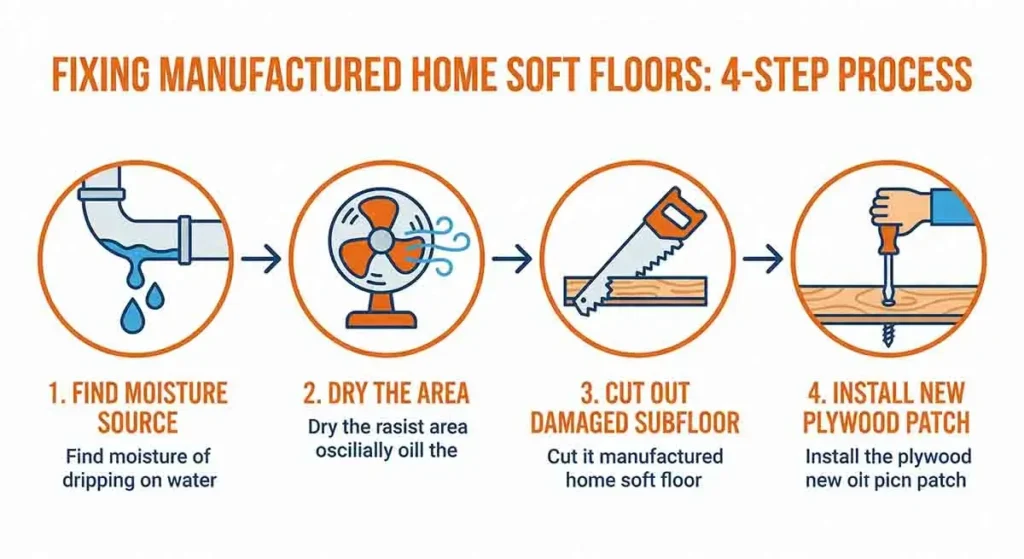
Step 2: Find and Fix the Source of Moisture
This is the most critical step, and many homeowners skip it. If you do not find and fix the moisture source first, any floor repair you do will fail again within months.
Check these areas carefully:
Under Sinks
Open the cabinet under every sink in the kitchen and bathrooms. Look for water stains, soft cabinet floor material, mineral deposits on pipes (indicating a slow drip), or visible standing water. Run the water and watch the drain and supply lines carefully.
Around Toilets
The wax ring seal between the toilet and the drain flange fails over time, allowing water to seep under the toilet with every flush. If the floor around the toilet base is soft, a failed wax ring is almost certainly the cause. Rock the toilet gently — if it moves, the wax ring has likely failed.
Under and Behind Appliances
Pull out your refrigerator and check for water from the ice maker line or the defrost drain. Check the dishwasher door seal and the area under the dishwasher. Check the area around the water heater for corrosion or rust staining at the base.
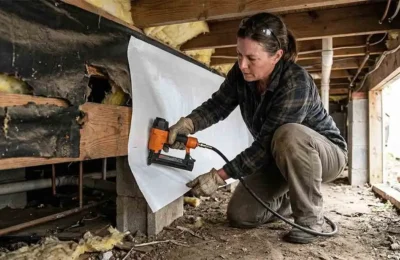
Under the Home
If you can safely access under your manufactured home, check the belly board for tears, holes, or sagging — these allow ground moisture to enter the floor cavity. Also look for damaged or disconnected drain pipes that may be depositing water into the cavity.
Once you have identified and repaired all moisture sources — fixed the leak, replaced the wax ring, repaired the belly board — allow the area to dry completely before beginning floor repairs. In humid conditions, this may take several days or even a week. Using a fan or dehumidifier in the affected area can speed drying.
Step 3: Assess the Extent of the Damage
You need to determine how much of the subfloor is damaged before choosing your repair approach. There are two ways to assess this:
From Below (Preferred)
If you can access the underside of the floor through the belly, look for areas where the belly board is stained, sagging, or torn. The floor damage is usually directly above the belly damage. Press up on the floor decking from below — soft areas will be obvious.
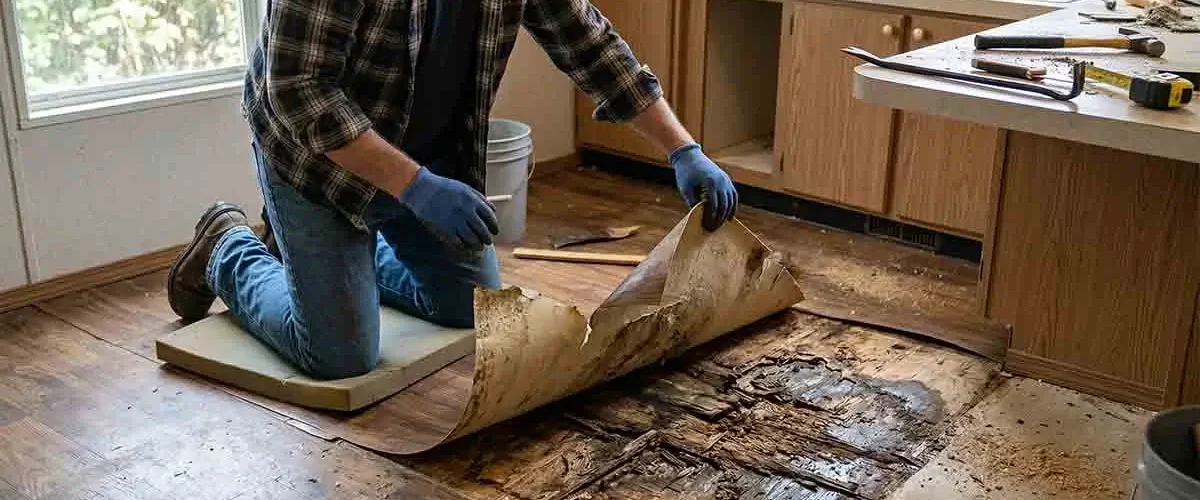
From Above
Remove the surface flooring (vinyl, carpet, or laminate) in the soft area to expose the subfloor. The damaged subfloor will be visually obvious — it will be darker in color, swollen, crumbling, or soft to the touch. Use a screwdriver to probe the subfloor: if the tip sinks in easily, the material is severely compromised.
Step 4: Choose Your Repair Method
Based on the extent of the damage, choose the appropriate repair approach:
Method A: Sistering (For Minor Soft Spots)
If the soft area is small — less than one square foot — and the subfloor is only slightly compromised, you may be able to stiffen it by adding support from below. This involves sistering (adding) a new joist or blocking alongside the existing one in the affected area.
This is a good approach for small areas near joist bays where the subfloor material is borderline but not severely damaged. It does not replace damaged material but can stop the softness from being felt underfoot.
Method B: Partial Subfloor Replacement (For Moderate Damage)
For larger soft spots — one to ten square feet — the best approach is to cut out the damaged subfloor section and replace it with new material. Here is how:
- Remove the surface flooring (vinyl, carpet, laminate) from the damaged area and a buffer zone around it
- Use a circular saw set to the exact depth of the subfloor (typically 5/8 inch or 3/4 inch — measure before cutting) to cut out the damaged section, making your cuts along joist lines so the new material has solid support at every edge
- Remove the cut-out section. If it crumbles, this confirms how badly it was damaged.
- Cut a patch from new 3/4-inch T&G (tongue and groove) plywood or treated OSB to fit the opening exactly
- Apply construction adhesive to the joists and any blocking before setting the new patch
- Screw the new patch into the joists with 2-inch deck screws every 6 inches
- Fill any gaps at seams with wood filler and allow to dry
- Install new surface flooring over the repaired area
Method C: Full Room Subfloor Replacement (For Severe or Widespread Damage)
If the soft spots cover a large area or if multiple rooms are affected, a full subfloor replacement may be necessary. This is a larger project — typically a full weekend or more — but it is the only way to properly address widespread damage.
Full replacement follows the same process as partial replacement but on a larger scale. In some cases, particularly for kitchen and bathroom floors, it may be more practical to hire a professional contractor experienced with manufactured home flooring repairs.
Material Choices for Subfloor Replacement
When replacing manufactured home subfloor, material choice matters:
- Treated plywood (best choice): 3/4-inch tongue-and-groove pressure-treated plywood is the most moisture-resistant option. It costs more but offers the best long-term protection.
- Standard plywood (good choice): 3/4-inch T&G plywood without pressure treatment is the standard manufactured home subfloor replacement material. Seal all edges with a waterproofing product before installation.
- OSB (avoid if possible): OSB is what many manufactured homes were originally built with, and its moisture vulnerability is why you are doing this repair in the first place. If you use OSB, use moisture-resistant OSB and seal all edges thoroughly.
Estimated Costs
- DIY partial repair (5 sq ft): $50 to $200 in materials
- DIY full room (100 sq ft): $200 to $600 in materials
- Professional partial repair: $300 to $800
- Professional full room replacement: $1,000 to $3,000
- Whole-home subfloor replacement: $3,000 to $8,000+
Preventing Future Soft Floor Problems
Once you have repaired your floors, take these steps to prevent the problem from recurring:
- Inspect under sinks and around toilets every six months for any sign of moisture
- Check and repair the belly board regularly to prevent ground moisture from entering
- Ensure proper drainage around the home to keep water away from the foundation and skirting
- Run a dehumidifier if you live in a humid climate and notice condensation under the home
- Address any roof damage promptly to prevent water from entering the wall and floor system
The Bottom Line
Soft floors in a manufactured home are a warning sign that should never be ignored. Left untreated, what starts as a soft spot the size of a dinner plate can spread to encompass entire rooms as moisture continues to damage adjacent subfloor material.
The repair process is entirely manageable as a DIY project for handy homeowners — the key is finding and fixing the moisture source first, then replacing the damaged material completely. Half-measures will only delay the inevitable.
Sandy Kowalski is a self-taught manufactured home renovator who transformed a $18,500 fixer-upper into a $78,000 property through eight years of hands-on DIY work. She writes about repairs, upgrades, and budget renovations from firsthand experience — no theory, just what actually works.