Proper insulation is one of the most impactful investments you can make in a manufactured home. Done right, insulating a manufactured home can reduce your energy bills by 20 to 40 percent, make your home dramatically more comfortable year-round, and extend the structural life of the home by protecting against moisture damage.
This complete guide covers every part of the manufactured home that needs insulation — the belly (floor), walls, roof, and skirting — and explains the best materials, methods, and estimated costs for each.
Why Manufactured Homes Need Special Attention to Insulation
Manufactured homes, particularly older ones built before the 1994 HUD Code updates, were often built with minimal insulation. Unlike site-built homes that have deep wall cavities and thick attic spaces, older manufactured homes sometimes have wall cavities of only 2×4 depth and roof cavities with little room for insulation.
Additionally, manufactured homes have a unique vulnerability that site-built homes do not have: the belly — the floor cavity between the home’s floor and the ground. This open space, covered by a vinyl or polyester belly wrap, is a major source of heat loss in winter and can harbor moisture problems if not properly protected.
Part 1: The Belly (Floor Insulation)
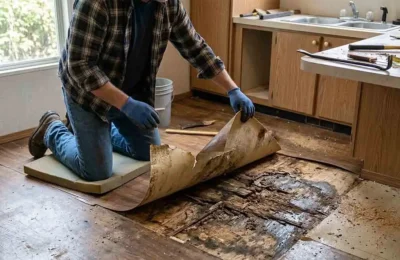
The belly is the underside of your manufactured home — the enclosed space between the floor decking and the ground. In most manufactured homes, fiberglass batt insulation is held in place by a black polyester belly wrap. Over time, this belly wrap can sag, tear, or be damaged by pests, allowing insulation to fall out and moisture to enter.
How to Inspect Your Belly
Walk around the perimeter of your home and look for any areas where the belly board is sagging, torn, or has holes. Use a flashlight to look under the home if it is accessible.
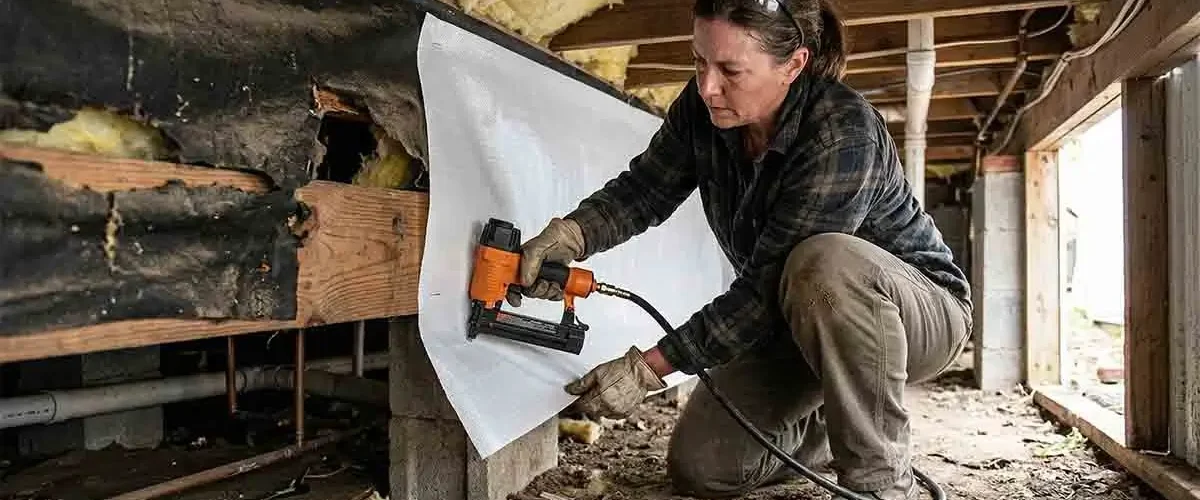
DIY Belly Repair and Re-Insulation
For small tears and sags, you can:
- Use heavy-duty staples or screws and belly board repair tape to close tears
- Push fallen insulation back up through small access holes
- Patch damaged areas with new belly board material
For major belly damage, the most effective solution is to have the entire belly board replaced with new material and re-insulated. This is typically a professional job costing $800 to $3,000 depending on home size.
Recommended Insulation for Belly
- Best option: Spray foam applied from below, combined with new belly board
- Good budget option: R-19 to R-30 fiberglass batts with properly secured belly board
- R-value target: R-19 minimum, R-30 ideal for cold climates
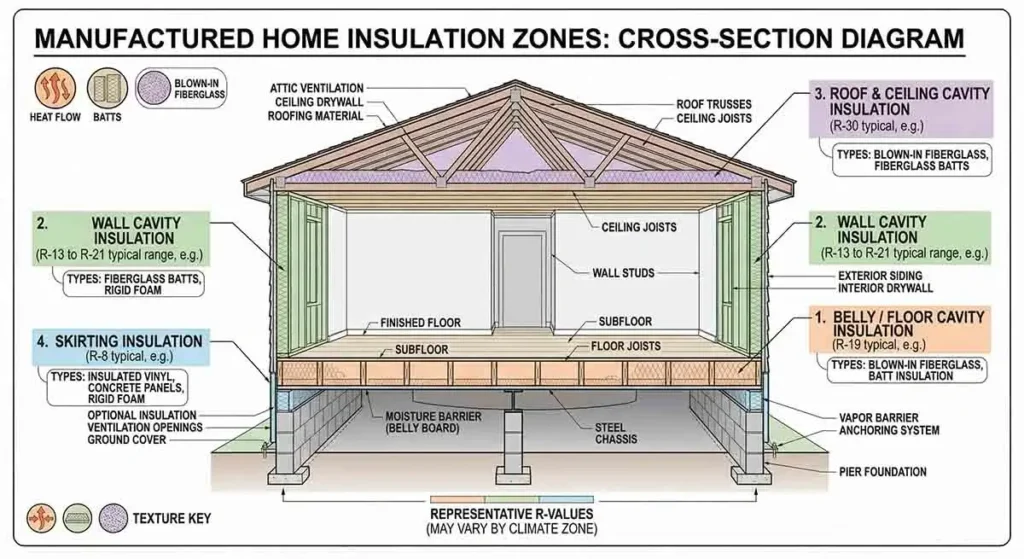
Part 2: Wall Insulation
Manufactured home walls are typically 2×4 or 2×6 construction with fiberglass batt insulation between the studs. The R-value of original wall insulation varies widely by age:
- Homes built before 1994: Often only R-11 in walls
- Homes built 1994 to 2021: R-13 to R-19 in walls
- Homes built after 2021 (new HUD energy standards): R-19 to R-21 in walls
Exterior Rigid Foam Insulation
One of the most effective upgrades for an older manufactured home is to install rigid foam board insulation (XPS or polyiso) on the exterior walls before residing. This adds R-5 to R-15 of continuous insulation without disrupting the interior. Cost: $2,000 to $6,000 for materials and installation.
Injection Foam
For existing homes without re-siding, injection foam can be injected through small holes drilled in the exterior or interior wall surface, filling the existing cavities with expanding foam. Cost: $1,500 to $4,000 depending on home size.
Part 3: Roof and Ceiling Insulation
Heat rises, which means the roof and ceiling are among the most important places to insulate. Most manufactured homes have a low-slope roof with a small cavity space.
Options for Roof Insulation
Add blown-in insulation to existing attic space: If you have attic clearance of 12 inches or more, blown-in cellulose or fiberglass is an excellent option. Target R-38 to R-60 in the ceiling and roof cavity. Cost: $800 to $2,500.
Spray foam on the underside of the roof deck: For homes with little attic clearance, closed-cell spray foam applied directly to the underside of the roof deck can add significant R-value. R-6 per inch means 3 inches of closed-cell foam adds R-18. Cost: $2,000 to $5,000.
Part 4: Skirting Insulation
Skirting plays an important role in insulation and moisture control. Uninsulated or poorly fitted skirting allows cold air to circulate freely under the home, undermining the belly insulation.
Best Skirting Options for Insulation
Insulated vinyl skirting: Vinyl skirting with a foam backer provides better insulation value than standard vinyl and is still affordable.
Foam board plus vinyl combination: Installing rigid foam board on the inside of your existing skirting is an affordable DIY option that significantly reduces cold air infiltration. One-inch XPS foam board cut to fit inside vinyl skirting panels adds R-5 at low cost.
Windows and Doors: Do Not Overlook These
Even the best wall and floor insulation will not prevent heat loss through old single-pane windows or poorly sealed doors. Upgrading to double-pane vinyl windows is one of the best energy investments in an older manufactured home. Window replacement costs $150 to $400 per window for manufactured home-specific sizes.
Expected Energy Savings
A comprehensive insulation upgrade on an older manufactured home can realistically reduce heating and cooling costs by 25 to 40 percent. On average monthly energy costs of $200, that is $50 to $80 per month in savings — or $600 to $960 per year. Most insulation upgrades pay for themselves in 3 to 7 years.
Where to Start If You Are on a Budget
If you cannot do everything at once, prioritize in this order:
- Belly repair and re-insulation — biggest single impact on heating costs
- Air sealing — caulk and foam around all penetrations, outlets, and gaps
- Ceiling and attic insulation — heat rises, this matters year-round
- Windows and doors — especially obvious drafts
- Wall insulation — hardest and most expensive, save for last
The Bottom Line
Insulating a manufactured home properly is not as simple as insulating a site-built home — the belly, low-slope roof, and original construction standards present unique challenges. But the payoff from doing it right is significant: lower energy bills, a more comfortable home, better moisture control, and a longer structural lifespan.
Start with the belly and air sealing — two relatively affordable improvements that deliver immediate, measurable results. Then work through the rest as your budget allows.
Sandy Kowalski is a self-taught manufactured home renovator who transformed a $18,500 fixer-upper into a $78,000 property through eight years of hands-on DIY work. She writes about repairs, upgrades, and budget renovations from firsthand experience — no theory, just what actually works.