Energy costs are one of the most significant ongoing expenses for manufactured homeowners — and one of the most controllable. With the right combination of improvements and habits, you can lower your electric bills in a manufactured home by 25 to 50 percent without sacrificing comfort.
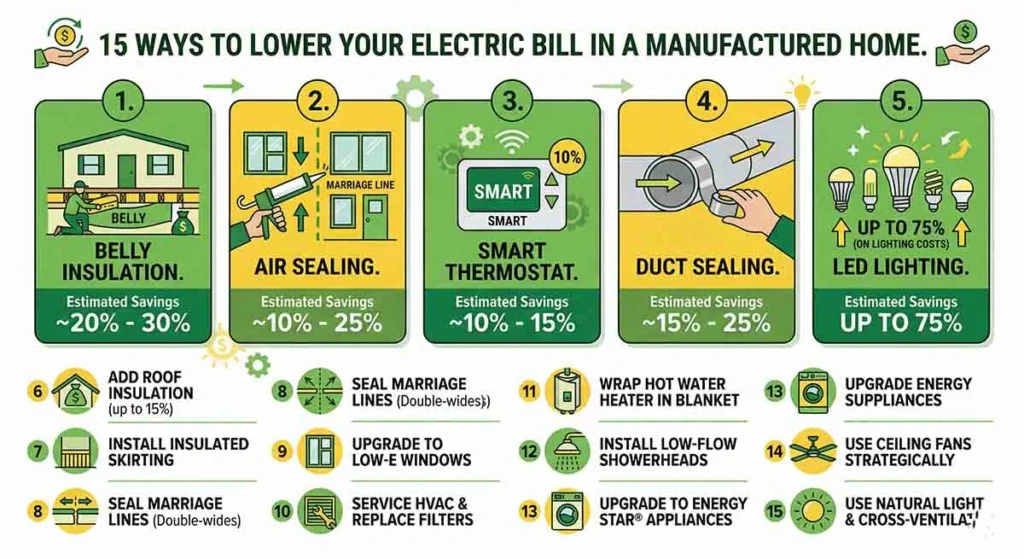
This guide covers 15 proven strategies, organized from the highest-impact to the most practical, to help you cut your energy costs starting this month.
Why Manufactured Homes Tend to Have Higher Energy Costs
Before diving into solutions, it helps to understand why manufactured homes — particularly older ones — often have higher energy costs than comparable site-built homes:
- Older HUD standards allowed thinner insulation than modern building codes require
- Single-pane aluminum windows are common in homes built before the 2000s
- The belly (floor cavity) is a major heat loss point unique to manufactured homes
- Older manufactured homes often have ductwork running through unconditioned belly space, losing heat before it reaches living areas
- Older HVAC systems are much less efficient than modern units
The good news is that every one of these vulnerabilities has an affordable solution. Here are 15 of them.
Tip 1: Seal and Insulate the Belly (Biggest Single Impact)
The belly of your manufactured home — the enclosed space between the floor and the ground — is often the single biggest source of heat loss in winter. Inspect the belly board (the material covering the underside of the home) for tears, holes, or sagging. Any damage allows cold air to circulate under the floor, driving up heating costs dramatically.
Repair belly board damage with heavy-duty tape and patching material specifically made for manufactured home belly repair. If the existing insulation has fallen or gotten wet, have it replaced. Adding spray foam insulation to the belly is one of the highest-ROI energy investments in an older manufactured home. Cost: $300 to $2,500 depending on severity.
Tip 2: Seal Air Leaks Throughout the Home
Air leaks — gaps and cracks where conditioned air escapes and unconditioned air enters — are responsible for a significant portion of energy waste in manufactured homes. Common leak locations include:
- Around electrical outlets and switch plates on exterior walls (add foam gaskets behind the covers)
- Where plumbing pipes enter and exit walls and floors (seal with spray foam)
- Around window and door frames (caulk exterior gaps; replace weatherstripping on doors)
- At the marriage wall seam in double wide homes
- Where the home meets the foundation or skirting
Air sealing with caulk and spray foam is one of the cheapest, highest-ROI energy improvements available. A thorough air sealing job costs $50 to $200 in materials and can reduce heating and cooling costs by 10 to 20 percent. This is a weekend DIY project for most homeowners.
Tip 3: Add a Programmable or Smart Thermostat
Setting your thermostat back 7 to 10 degrees for 8 hours a day can reduce heating and cooling costs by up to 10 percent per year, according to the Department of Energy. A programmable thermostat automates this — cooling less aggressively while you are at work, and warming the home before you return.
Smart thermostats like the Google Nest or Ecobee go further, learning your schedule and preferences and optimizing automatically. The cost is $30 to $250, and most pay for themselves within one to two years.
Tip 4: Service Your HVAC System Annually
A poorly maintained HVAC system can use 15 to 25 percent more energy than a clean, well-maintained system. Annual maintenance includes:
- Replacing air filters every 1 to 3 months (a dirty filter makes the system work harder)
- Having a technician clean the coils and check refrigerant levels annually
- Ensuring all vents are open and unobstructed
- Having ductwork checked for leaks — particularly in manufactured homes where ducts run through the belly
Tip 5: Seal and Insulate Ductwork
In manufactured homes, ductwork for the HVAC system often runs through the belly — an unconditioned space. If the ducts have gaps, seams, or are poorly insulated, you can lose 20 to 30 percent of your heating and cooling energy before it ever reaches the living space.
Have the ductwork inspected for leaks. Leaks can be sealed with mastic sealant (not tape — mastic is more durable). Ducts running through the belly should be insulated with duct wrap insulation. Professional duct sealing and insulation costs $300 to $1,000 but can reduce HVAC energy consumption significantly.
Tip 6: Upgrade to LED Lighting Throughout
If you still have incandescent bulbs, replacing them all with LED bulbs is one of the easiest and cheapest energy upgrades available. LEDs use 75 percent less electricity than incandescent bulbs and last 15 to 25 times longer. Replacing all bulbs in a typical manufactured home costs $30 to $80 and saves $50 to $150 per year in electricity.
Tip 7: Upgrade Old Appliances to Energy Star Models
Older appliances — particularly refrigerators, washing machines, and dishwashers — consume far more electricity than modern Energy Star-rated models. A refrigerator from the 1990s can use two to three times the electricity of a current Energy Star model. While appliance upgrades require upfront investment, the energy savings over time are real and meaningful.
Prioritize replacing the oldest and most-used appliances first. Check for utility rebates in your area — many utilities offer $50 to $200 rebates for purchasing Energy Star appliances.
Tip 8: Replace Single-Pane Windows
Single-pane aluminum windows — common in manufactured homes built before the late 1990s — are extremely poor insulators. They allow heat to escape in winter and radiate heat into the home in summer, dramatically increasing HVAC loads.
Manufactured-home-specific replacement windows are available from suppliers like Windowworld, Home Depot, and manufactured home supply stores. Replacement windows typically cost $150 to $400 per window installed. Replacing the 8 to 12 windows in a typical manufactured home is a significant investment ($1,500 to $5,000), but the energy savings and comfort improvement are substantial.
As a lower-cost interim measure, interior window insulation film kits ($5 to $15 per window) create an air pocket that significantly improves window insulation at a fraction of the cost of window replacement.
Tip 9: Add Insulated Skirting
Skirting that fits poorly or has gaps allows cold air to circulate under the home, undermining your belly insulation. Inspect your skirting for gaps, cracks, and missing sections. Adding rigid foam board to the inside of your skirting panels is a simple, low-cost upgrade that adds insulation value (R-5 per inch of foam board) and reduces cold air infiltration under the home.
Tip 10: Use Ceiling Fans Strategically
Ceiling fans can reduce air conditioning costs by making rooms feel 4 to 8 degrees cooler, allowing you to set the thermostat higher without sacrificing comfort. In winter, reverse the fan direction (counterclockwise as viewed from below pushes warm air down) to distribute rising warm air back to the living level.
Ceiling fans cost $30 to $200 and have very low operating costs. If you do not have them in major rooms, adding them is one of the best comfort-per-dollar upgrades available.
Tip 11: Install Low-Flow Showerheads and Faucet Aerators
Water heating typically accounts for 10 to 15 percent of a home’s energy use. Low-flow showerheads ($15 to $40) reduce hot water use by 25 to 50 percent without noticeably reducing shower pressure. Faucet aerators ($5 each) reduce flow at bathroom and kitchen faucets. These are among the cheapest energy upgrades with the fastest payback periods.
Tip 12: Insulate Your Water Heater and Pipes
If you have a storage tank water heater, adding an insulating blanket ($20 to $30) can reduce standby heat loss by 25 to 45 percent. Also insulate the first 6 feet of hot water pipes leaving the water heater with foam pipe insulation ($5 to $15 total). Both are easy DIY improvements with rapid payback.
Tip 13: Use Power Strips and Eliminate Phantom Loads
Electronics and appliances draw power even when turned off — this is called phantom load or standby power. TVs, cable boxes, gaming consoles, and phone chargers are the biggest culprits. Plugging these devices into smart power strips and turning off the strip when not in use can save $50 to $100 per year.
Tip 14: Plant Shade Trees Strategically
If your manufactured home receives direct sun on the west or south walls during the afternoon — the hottest part of summer days — strategic tree planting can reduce cooling costs by 15 to 50 percent by shading the home and its air conditioning unit. Deciduous trees are ideal because they provide shade in summer while allowing winter sun through after leaf drop.
Trees take time to grow, but this is a long-term investment with lasting returns. Check with your local utility or cooperative extension service for free or discounted tree programs.
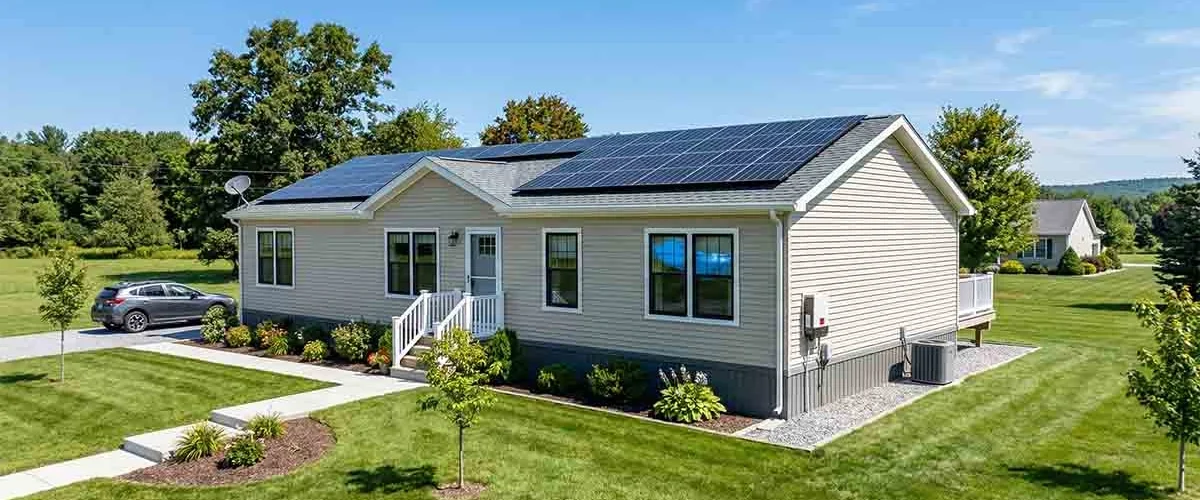
Tip 15: Consider Solar — It Works on Manufactured Homes Too
Solar panels can be installed on manufactured homes just as on site-built homes, provided the roof is in good condition and the home is on a permanent foundation you own. In sunny states, solar can eliminate 50 to 100 percent of your electric bill. Federal tax credits currently offset 30 percent of installation costs.
Before going solar, complete all the insulation, air sealing, and efficiency upgrades first — it is more cost-effective to reduce your electricity consumption before sizing and installing a solar system.
The Bottom Line
Lowering electric bills in a manufactured home is very achievable with a combination of simple behavioral changes, affordable DIY improvements, and strategic upgrades. Start with air sealing and belly repair — they deliver the biggest results for the least money. Then work through the list as your budget allows.
Most manufactured homeowners who implement even half of these tips see a meaningful reduction in their monthly energy bills within the first 90 days.
Beth Anne Calloway is a rural development specialist turned writer with 15 years of experience helping families navigate land use, USDA programs, rural zoning, and manufactured home placement on private land. She and her husband live on 12 acres in East Tennessee in a manufactured home they placed themselves — and she learned every lesson the hard way so you do not have to.